
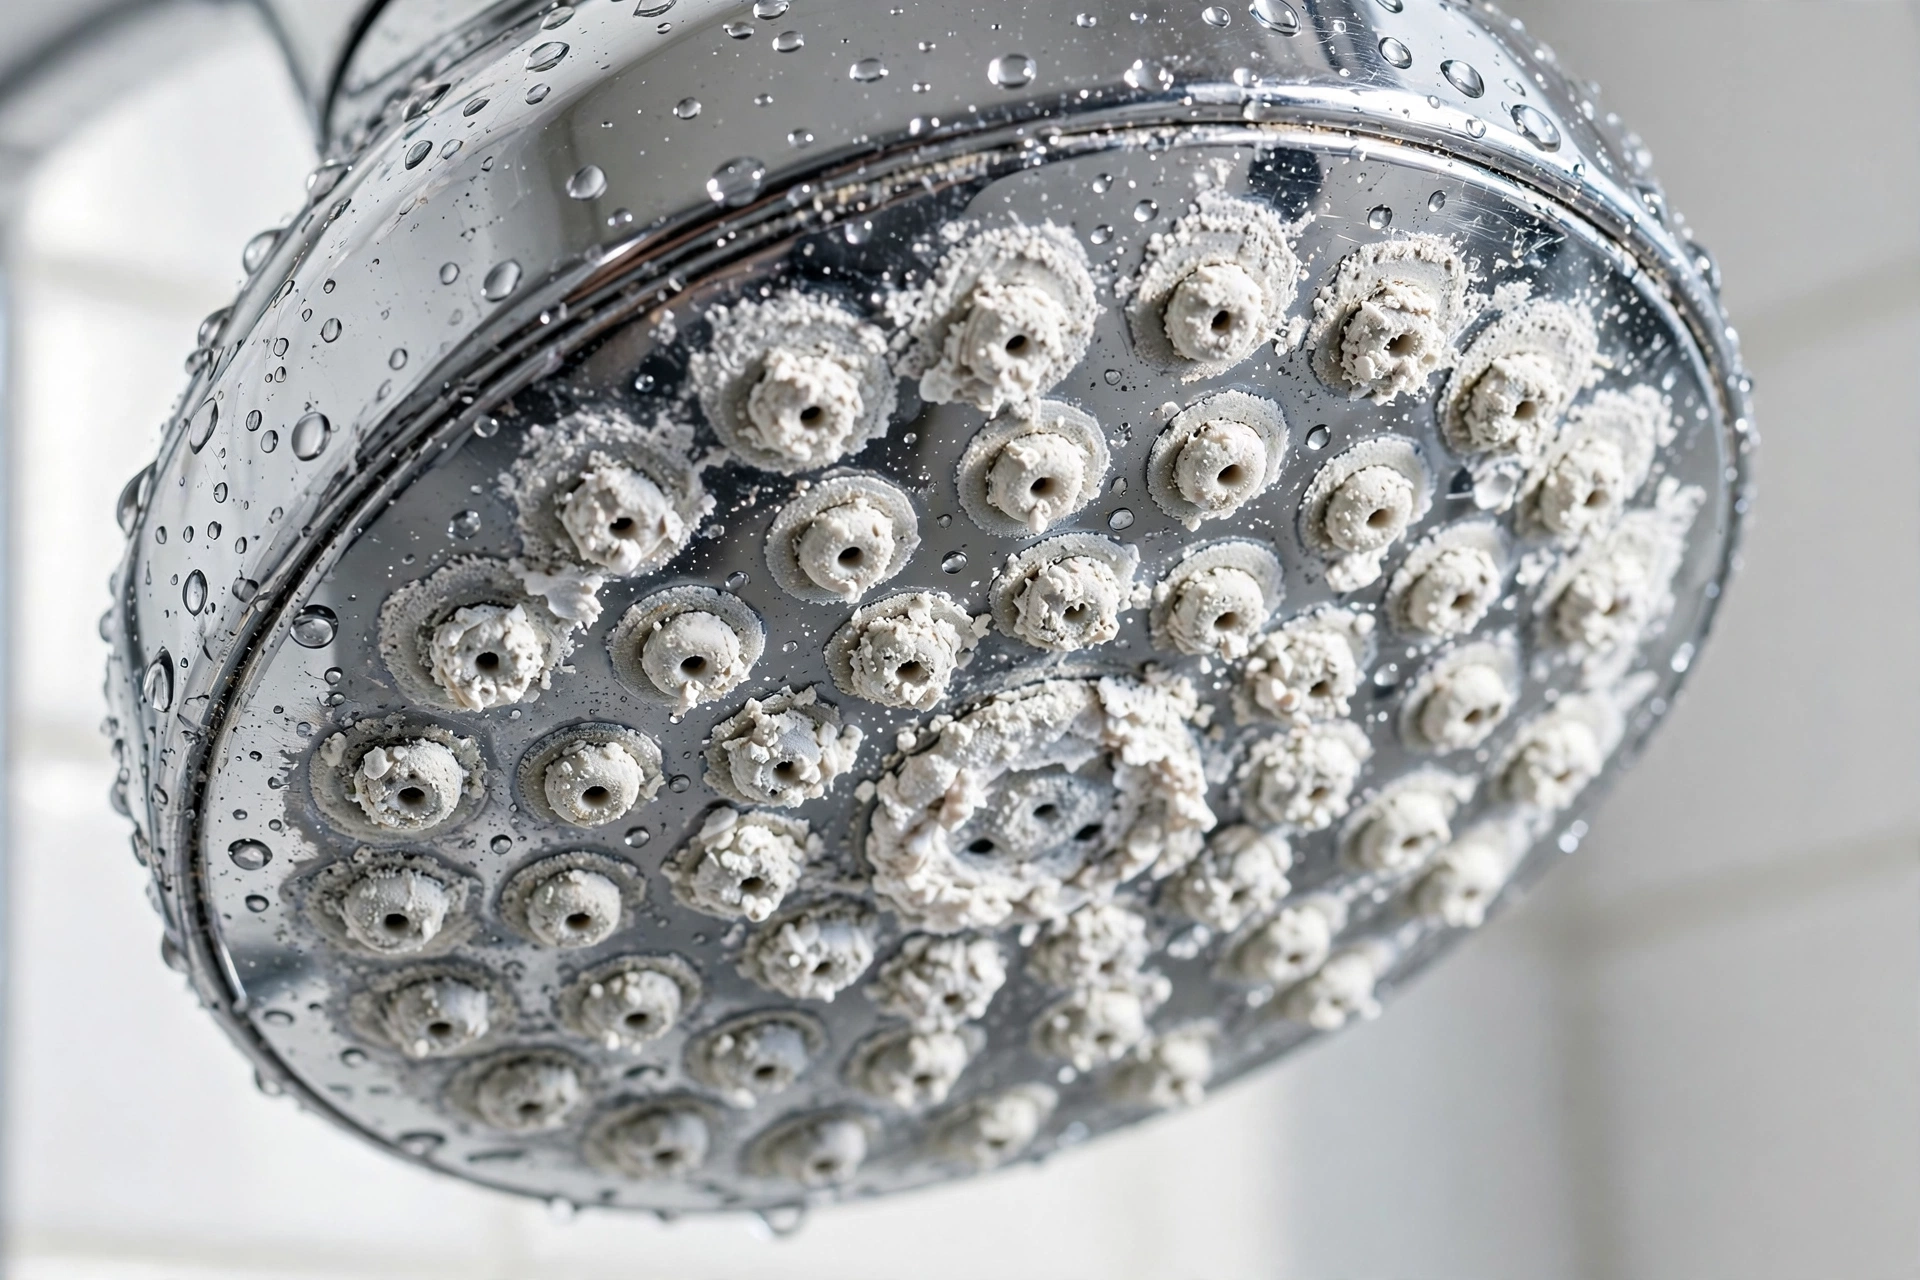

A shower head is supposed to be the simplest thing in the bathroom. Water goes in, water comes out. So when your shower starts spraying sideways, dribbling from half its nozzles, or losing pressure for no obvious reason, it feels like a plumbing problem — and the first instinct is to buy a new shower head.
Don’t. In almost every case, the problem is limescale: the same chalky mineral crust that clouds glass shower doors and spots sinks. Hard water leaves a little calcium behind every time it evaporates, and inside a shower head that crust builds up exactly where it does the most damage — in the tiny nozzle holes. The fix is cheap, takes about an hour of mostly waiting, and needs nothing you don’t already own.
Key Takeaways
How to clean a shower head: first check whether the spray is weak, crooked, or missing from some nozzles — that is limescale clogging the jets, and vinegar dissolves it. For a fixed head, tie a bag of undiluted white vinegar over the nozzles for 1 to 2 hours; for a removable head, unscrew it and soak it in a bowl of vinegar for 30 minutes to overnight. Then scrub each nozzle with an old toothbrush, poke any still-blocked hole with a toothpick, rinse, and reattach. Chrome and stainless steel tolerate a long soak; matte black, brushed gold, and oil-rubbed bronze do not — 30 minutes max.
Table of Contents
- What’s Wrong With Your Shower Head?
- What You Need
- Step 1: The 30-Second Flow Test
- Step 2: The Bag Method (Fixed Shower Heads)
- Step 3: The Bucket Soak (Removable Shower Heads)
- Step 4: Clear Each Nozzle
- Step 5: Rinse, Reattach, and Test
- Mind the Finish
- What NOT to Do
- How Often to Clean It
- For Further Reading
- FAQ
- The Bottom Line
What’s Wrong With Your Shower Head?
Look at the spray before you start — different symptoms point to different causes, and guessing wrong is how people replace a perfectly good shower head.
| Symptom | What it looks like | What it is | First move |
|---|---|---|---|
| Weak, thin spray | Water trickles out of every nozzle | Limescale narrowing the jets | Vinegar soak (Step 2 or 3) |
| Crooked jets | Some streams shoot sideways | One side of a nozzle is blocked | Toothbrush + toothpick (Step 4) |
| Dead nozzles | Some holes spray nothing at all | A nozzle fully plugged with scale | Long soak, then poke (Steps 3–4) |
| White crust | Chalky buildup around the nozzles | Dried calcium and magnesium | Vinegar soak (Step 2 or 3) |
| Green or pink film | Slimy colored patches on the face | Biofilm and bacteria in damp nozzles | Vinegar soak + scrub (Steps 2–4) |
Visible crust plus an uneven spray means limescale, and this article is the whole fix. If the head looks clean and pressure is still low, the cause is further up the line — see Step 5.
What You Need
Distilled white vinegar, a sturdy zip-top freezer bag, a rubber band or zip tie, an old toothbrush, a wooden toothpick, a microfiber cloth, and an adjustable wrench with a cloth wrapped around the jaws. For a removable head, a bowl or bucket big enough to submerge it. Skip bleach, oven cleaner, and scouring pads — none dissolve limescale, and all can damage the finish.
Step 1: The 30-Second Flow Test
Do this before you clean anything — it gives you a before-and-after to compare. Turn the shower on full and hold your hand under the spray: which nozzles are dead, which shoot sideways, how hard does it feel? Snap a photo of the spray pattern — ten minutes from now you won’t remember how bad it was.
Then turn the water off and wipe the face with a dry cloth. If the nozzles are rubber, press each one gently — silicone flexes, and that alone can pop loose flakes of scale. If a few jets improve, limescale is confirmed.
Step 2: The Bag Method (Fixed Shower Heads)
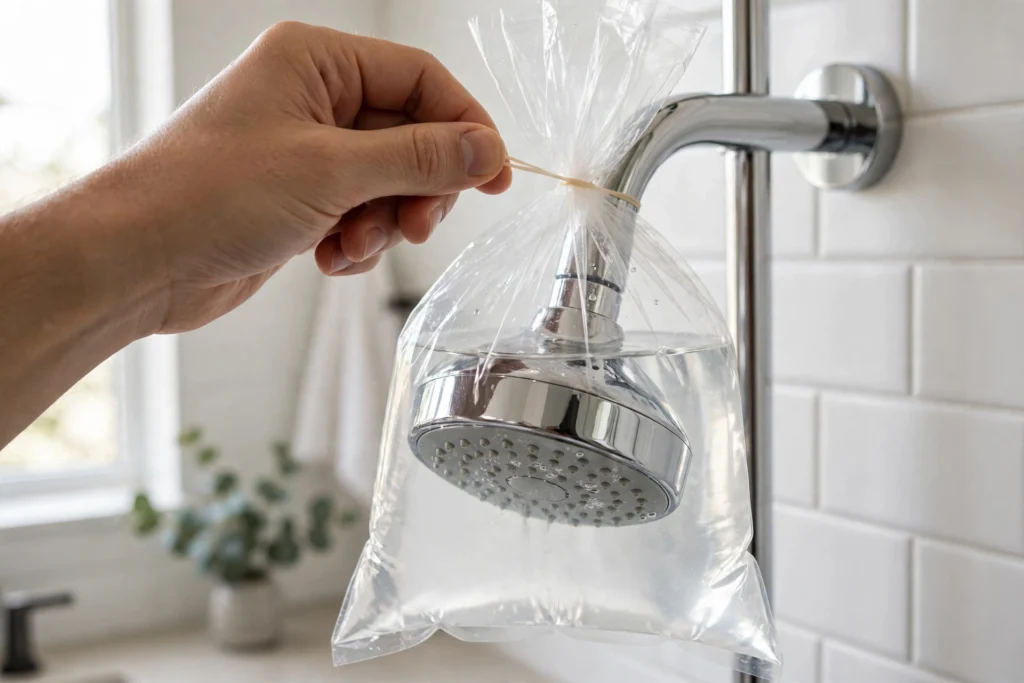
If your shower head doesn’t unscrew — most fixed and rainfall heads don’t, or shouldn’t be forced — clean it where it hangs. The bag method works because the vinegar stays in contact with the nozzles the whole time. Use a zip-top freezer bag, not a thin grocery bag — vinegar is heavy, and a torn bag is a mess.
- Fill the bag about halfway with undiluted white vinegar — full-strength vinegar is roughly 5% acetic acid, and that mild acid dissolves calcium carbonate.
- Lift the bag over the shower head so the whole face is submerged.
- Secure it at the neck with a rubber band or zip tie, and check the seal — a slow leak drips vinegar down the wall all afternoon.
- Leave it 1 to 2 hours for routine buildup, or up to 8 hours overnight if the flow has slowed to a trickle. For coated finishes, cap the soak at 30 minutes — see the finish table below.
- Remove the bag and move on to Step 4.
Step 3: The Bucket Soak (Removable Shower Heads)
If your head unscrews — most handheld and standard wall-mounted heads do — a bucket soak cleans it more thoroughly than the bag method, because you can get at the inside too.
- Unscrew the head by hand first. If it won’t budge, wrap a cloth around the nut and use an adjustable wrench, turning counter-clockwise — the arm threads are often plastic, so go gently.
- Check the small mesh filter inside the connection and rinse it under the tap — a clogged filter alone can halve your pressure.
- Submerge the head completely in a bowl or bucket of undiluted white vinegar. Soak 30 minutes for light buildup, several hours to overnight for a badly clogged head. Coated finishes: 30 minutes maximum.
Step 4: Clear Each Nozzle
Soaking dissolves the scale, but it doesn’t always flush it out — this is the step most people skip, and the difference between “a bit better” and “like new.”
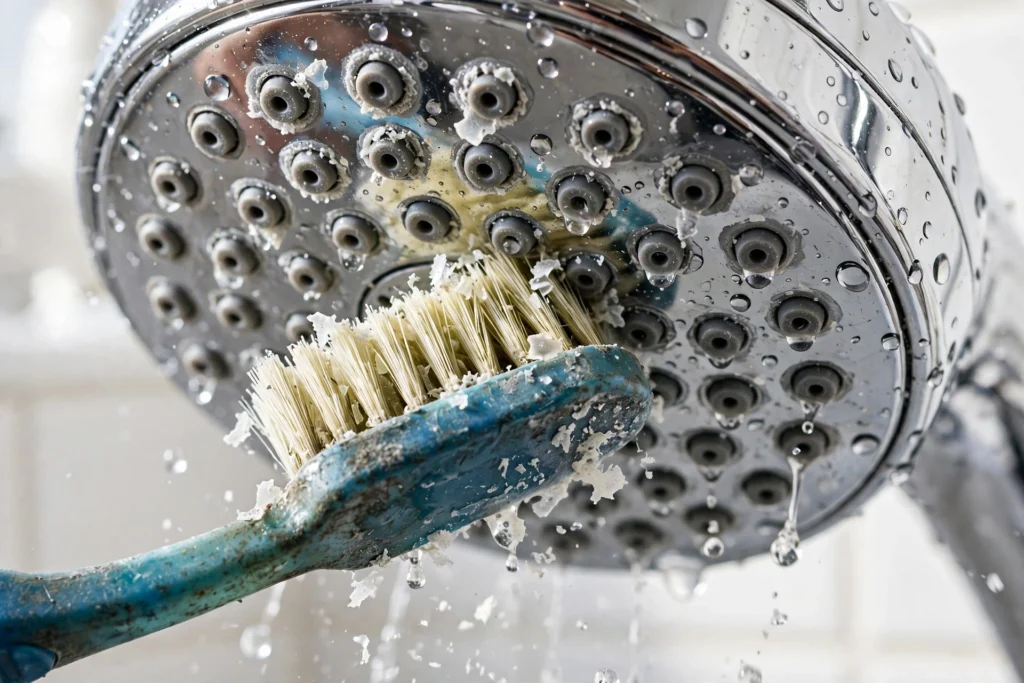
Scrub the face with the old toothbrush in small circles, paying attention to the ring around each nozzle. Then go nozzle by nozzle: press rubber nozzles with your fingertip, and for any hole still blocked, push a wooden toothpick gently into it and wiggle. Never use a needle or pin — metal scratches the opening, and the scratch becomes the next place scale sticks. Rinse under hot running water as you work, so loosened flakes wash out instead of settling back in.
Step 5: Rinse, Reattach, and Test
Run the shower for a full minute with the head off to flush the arm and the line — loosened scale in the pipe will just re-clog the head. Then reattach by hand, snug it a quarter-turn past hand-tight with the wrench, and turn the water on.
Compare the spray to your Step 1 test — every nozzle should fire straight and strong. If one or two are still dead, repeat Step 4 on those holes only.
Still weak everywhere? The head is innocent. Check the mesh filter inside the connection, then run the water with the head off: strong flow means the head was the problem; weak flow means the blockage is in the arm or valve. A flow-restrictor disc inside the connection can also strangle pressure — removing it (where local rules allow) can transform the shower. If every tap in the house is weak, the cause is the main supply: check the shut-off valve is fully open, then call a plumber.
Mind the Finish
Not every shower head is bare chrome, and acid is not kind to coatings. Check your finish before you soak — the time that saves a chrome head can ruin a matte black one.
| Finish | Vinegar soak | What to do instead |
|---|---|---|
| Chrome | Up to 8 hours, safe | Full vinegar soak |
| Stainless steel | Up to 8 hours, safe | Full vinegar soak |
| Brushed nickel | 30–60 minutes | Rinse promptly, don’t leave overnight |
| Matte black | 30 minutes max | Dilute 50/50 with water, rinse right away |
| Brushed gold | 30 minutes max | Dilute 50/50 with water, rinse right away |
| Oil-rubbed bronze | 30 minutes max | Dilute 50/50 with water, rinse right away |
| Plastic | 1–2 hours | Full soak is fine, but check for cracks first |
If you’re not sure what finish you have, assume it’s coated: a 50/50 vinegar and water mix for 30 minutes, then rinse. Never mix vinegar with bleach — the two make chlorine gas.
What NOT to Do
Most shower head damage is self-inflicted, and it’s almost always one of these:
- Don’t use bleach on limescale. Bleach whitens scale; it doesn’t dissolve it. It also eats at finishes and, mixed with vinegar, makes toxic gas.
- Don’t use a needle or pin on the nozzles — metal scratches the opening and gives the next layer of scale something to grip.
- Don’t use steel wool or scouring pads. They scratch chrome and strip coatings.
- Don’t leave vinegar on a coated finish overnight. Thirty minutes is the limit for matte black, gold, and bronze.
How Often to Clean It
A clean head stays clean with a short routine. In a hard-water home, descale every 1 to 2 months; in a soft-water home, every 3 to 4 months is plenty. Between deep cleans, rub the rubber nozzles with your fingertips once a week while the water runs. Five minutes of prevention beats an hour of descaling.
For Further Reading
- How to Remove Hard Water Stains From Glass Shower Doors — the same mineral on glass.
- How to Clean Bathroom Grout — the bathroom sibling for grout lines.
- How to Get Black Mold Off Shower Caulk — when the problem is mold, not minerals.
- How to Get Mildew Out of a Shower Curtain — the curtain side of the same shower.
- How to Clean a Stainless Steel Sink (Without Scratching the Grain) — the same dissolve-don’t-scrub method on the sink.
- How to Remove a Toilet Bowl Ring — the other hard-water mark in the bathroom.
FAQ
Can I clean a shower head without removing it?
Yes — that’s the bag method in Step 2: fill a sturdy bag with undiluted white vinegar, tie it over the head so the nozzles are submerged, and leave it 1 to 2 hours. It works as well as a bucket soak for most buildup.
How long should I soak a shower head in vinegar?
Chrome and stainless steel can soak up to 8 hours; 1 to 2 hours handles routine scale. Coated finishes — matte black, brushed gold, oil-rubbed bronze — never longer than 30 minutes.
Will vinegar damage my shower head?
Not if you match the soak to the finish. Chrome and stainless steel shrug off a long vinegar bath; coated finishes can dull or peel, so keep their soaks short and rinse right away. When in doubt, assume coated and go gentle.
Why is my shower pressure still low after cleaning?
Check the mesh filter inside the head’s connection first — sediment clogs it independently of the nozzles. If the flow is weak with the head removed, the problem is the shower arm, a flow restrictor, or the house supply.
Can I use baking soda instead of vinegar?
Baking soda helps as a gentle scrub after the soak, but it doesn’t dissolve limescale — only an acid does that. Vinegar is the dissolver; baking soda is the polisher.
The Bottom Line
I’ll be honest: for years I assumed a weak shower meant bad plumbing or a cheap shower head, and I lived with a spray that hit everywhere except me. The fix turned out to be a bag of vinegar and an old toothbrush. Identify the symptom, match the soak to the finish, clear each nozzle by hand, and test before and after. An hour of mostly waiting, once every couple of months, and your shower sprays like the day it was installed.


